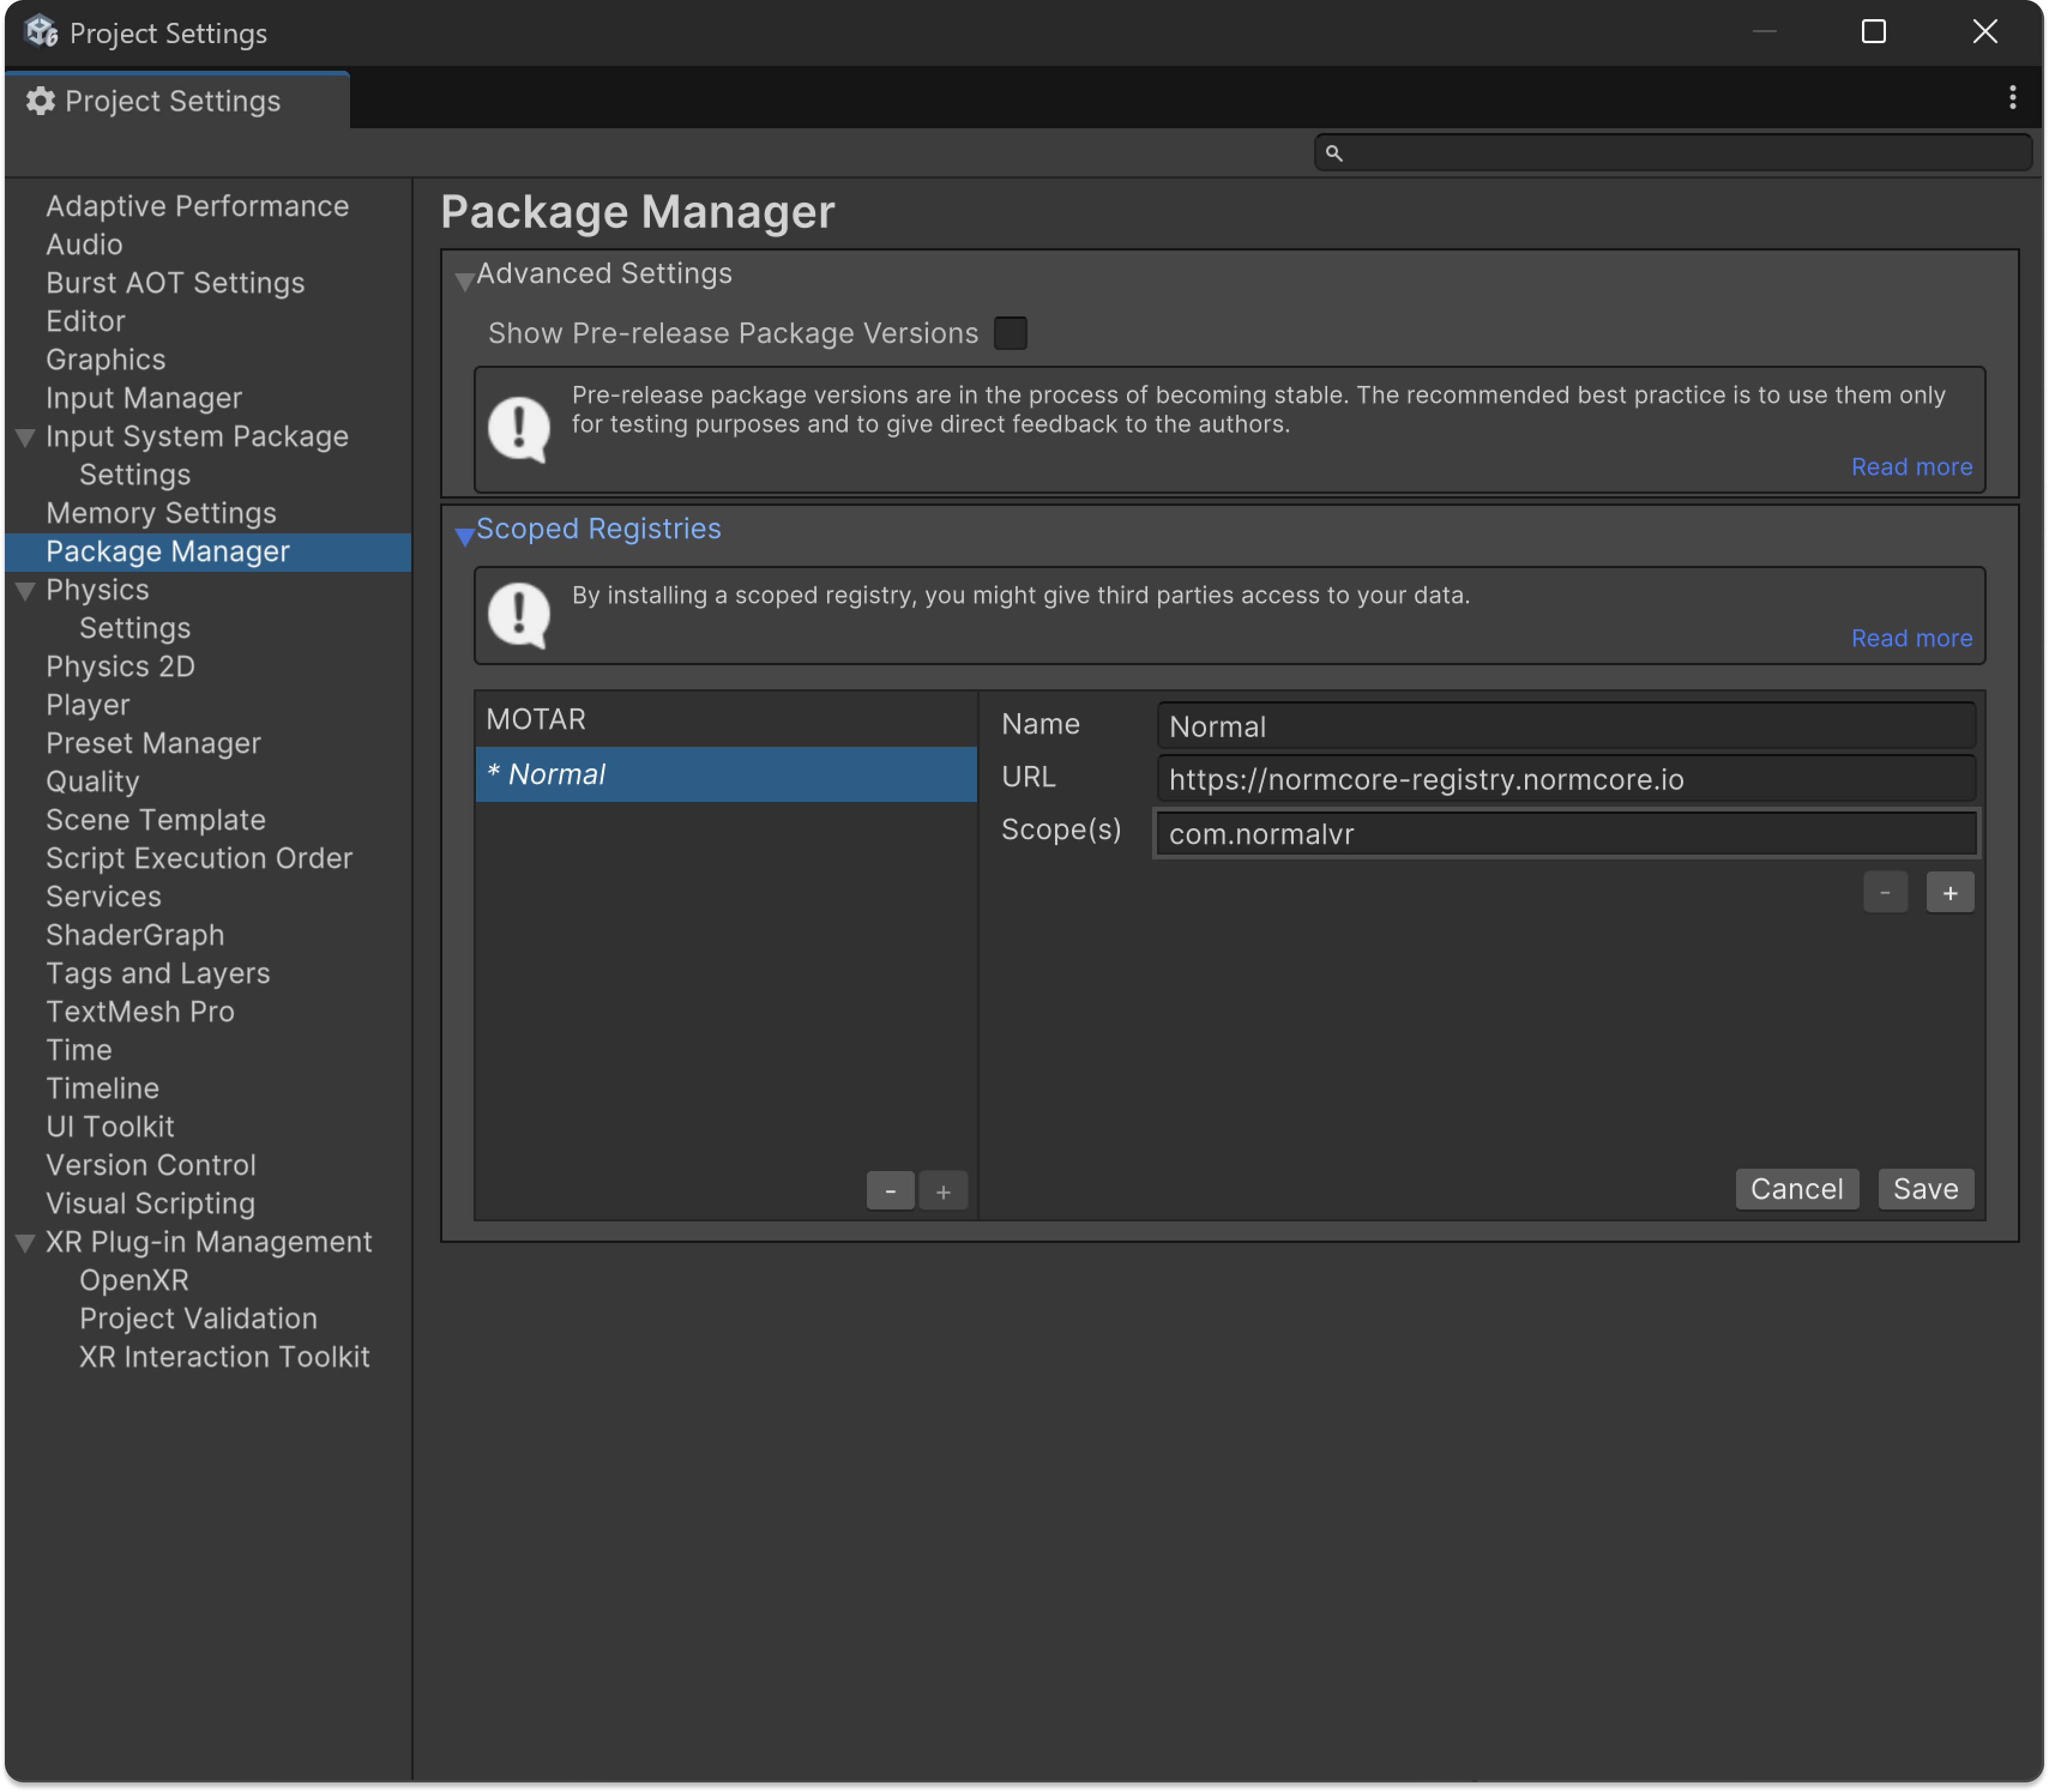
Multiplayer - Normcore
1 - Getting Started
The following guide was created using Unity 6.0.32 LTS, your editor views may differ. Normecore and MOTAR SDK are both compatible with Unity 2021LTS+.
This guide assumes you have a Unity project using the MOTAR SDK, our Avatar, and want to integrate Normcore multiplayer into your project. For more information on setting up your project with the MOTAR SDK for Unity, see MOTAR SDK for Unity
**Mac Users**
If the user is on a Mac device, please note that the silicon version does not support all plugins that are supported by the Intel version. It is recommended to download both the silicon and Intel Editors (only one version can be run at a time).
2 - Project Setup
Install the Normcore Package
Normcore is added with a Scoped Registry, similar to the MOTAR SDK
🔨 Install Normcore
Open the Project Settings window and click on “Package Manager.”
Inside the Package Manager tab, under “Scoped Registries”, click the plus button underneath MOTAR to add a new scoped registry.
Add the following:
Name: Normal
Scope(s): com.normalvr

Now let’s open the “Package Manager” window by clicking Window -> Package Manager from the top bar toolbar.
Inside the Package Manager, click on “Normal” under “My Registries” on the left side of the window.
Click on “Normcore” and click “Install”.

3 - Configure the MOTAR SDK
Configure your Avatar
The MOTAR SDK Avatar prefab (loaded with the Samples packages) can be configured to work as a Normcore avatar for multiplayer.
👨🔬 Configure Avatar Prefab
From the Project window, navigate to Assets -> Samples -> MOTAR SDK -> <current version> -> Avatar -> Resources.

Inside Resources double click on the prefab “MOTAR_Player.”

Inside the prefab click and drag the gameObject named “Avatar” into the Resources folder we just navigated to.

This will create a new prefab of just the Avatar’s mesh which we will use to spawn with Normcore.
Let’s rename the new prefab to “MOTAR_MultiplayerAvatar.”

Double click on the new prefab we just created
When prompted to save or discard our changes to “MOTAR_Player” click “Discard Changes".

Attach networking components
Now that we have our new prefab open we need to attach all the Normcore networking components.
Assign Variables
Now that we have the components added, we need to assign the component variables.
📑 Variables
From the Hierarchy window select and drag the gameObject labeled “Head” into the “Head” variable slot on the “Realtime Avatar” component.
Now do the same for the “Left Hand” and “Right Hand” variable slots by dragging the gameObjects labeled “Left Hand” and “Right Hand.”

Click on “Add Component” again and search for “Realtime Transform” then select it to add it.

Now let’s move onto the children gameObjects.
From the Hierarchy window select the gameObjects labeled “Head.”
Remove the current components attached because they’re no longer required.
From the Inspector window click the three dots button on both the “Rigidbody” and “Parent Constraint” components and select “Remove Component.”

With the “Head” gameObject still selected click on “Add Component” in the inspector and search for “Realtime View” then select it to add it.
Click on “Add Component” again and search for “Realtime Transform” then select it to add it.

Now navigate to the child gameObject of the “Head” labeled “Avatar_FlatHead_1” and select it.
We need to add back a Rigidbody component so that the Torso’s configurable joint can have a connection.
With “Avatar_FlatHead_1” selected click on “Add Component” and search for “Rigidbody” then select it to add it.
On the “Rigidbody” component check off “Use Gravity” and check on “Is Kinematic.”

Next navigate to the gameObject labeled “Torso.”
From the Inspector window, check off “Is Kinematic” on the Rigidbody component.
We need to fix the missing rigidbody on the first configurable joint.
From the Hierarchy window, click and drag the gameObject labeled “Avatar_FlatHead_1” into the variable slot labeled “Connected Body” on the Configurable Joint component.

Next navigate to the gameObject labeled “Left Hand.”
We need to remove the current component parent constraint because it’s no longer required.
From the Inspector window click the three dots button on the “Parent Constraint” components and select “Remove Component.”
Click on “Add Component” again and search for “Realtime Transform” then select it to add it. “Realtime View” will automatically be added.

Next navigate to the gameObject labeled “Right Hand.”
We need to remove the current component attached because it’s no longer required.
From the Inspector window click the three dots button on the “Parent Constraint” components and select “Remove Component.”
Click on “Add Component” again and search for “Realtime Transform” then select it to add it. “Realtime View” will automatically be added.

That’s all the changes we need to make on this prefab. Click “Save” on the top right of the Scene window and exit the prefab.
Now, if you haven’t already, let’s open the scene you plan on using the avatar in.
From the Hierarchy window select the gameObject labeled “MOTAR_Player”.
If you don’t already have one in your scene, from the Project window navigate to Assets -> Samples -> MOTAR SDK -> 1.0.2 -> Avatar -> Resources and drag the prefab labeled “MOTAR_Player” into your scene.
Open the gameObject and navigate to the gameObject labeled “Avatar.”
Disable the gameObject by clicking the check box next to the name from the Inspector window.

🏁 Finish Line
✅ Final Steps
🎉 Now we just have to set up our connection to the network.
With your scene open, click GameObject -> Create Empty from the top toolbar.
Rename the new gameObject to “Realtime” or whatever best suits your needs.
With the “Realtime” gameObject selected, from the Inspector window click on “Add Component” and search for “Realtime.”
Select it to add it to the gameObject.
On the “Realtime” component rename the “Room Name” to something unique.
You’ll need to acquire and add your Normal App Key to the “App Key” variable slot as well.
With the “Realtime” gameObject still selected click on “Add Component” in the inspector and search for “Realtime Avatar Manager” then select it to add it.
From the Project window navigate to back to Assets -> Samples -> MOTAR SDK -> 1.0.2 -> Avatar -> Resources and drag the new avatar prefab we created labled “MOTAR_MultiplayerAvatar” into the “Local Avatar Prefab” variable slot on the “Realtime Avatar Manager” component.

Now from the Hierarchy window find the “MOTAR_Player” gameObject we added earlier and drag it into the “Local Player: Root” variable slot on the “Realtime Avatar Manager” component.
Twirl open the child gameObject labeled “Camera Offset” nested inside of “MOTAR_Player.”
Find the “Main Camera” gameObject and drag it into the “Local Player: Head” variable slot on the “Realtime Avatar Manager” component.
Now find the “Left Controller” gameObject and drag it into the “Local Player: Left Hand” variable slot on the “Realtime Avatar Manager” component.
Lastly, find the “Right Controller” gameObject and drag it into the “Local Player: Right Hand” variable slot on the “Realtime Avatar Manager” component.

Save your scene.
🏁 You’re now all set up and ready!
Additional setup is require for the Avatar hand animations and are not covered in this guide.
Last updated